>Canukistani’s Canadian Style Maple Syrup: A Recipe

>Canukistani, a fellow Canadian and a reader of this blog, noticed that I haven’t posted any recipes in a while, and gave me the gift of the following great post to share with everybody. It is not only useful, it’s funny like hell. I laughed so hard, I’m in actual pain right now. Enjoy! And never say that Canadians don’t have a sense of humor ever again. Thank you, Canukistani!!


Canadian Style Maple Syrup
(Eat your heart out Martha Stewart)
This is my recipe for making Maple syrup from scratch. You might wonder why not just buy it at the store. This stuff is damn expensive! Here’s a graph of the cost in various cities. And you think gas is pricey.

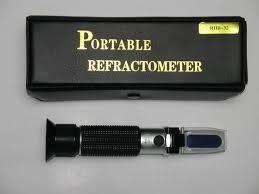
You’ll need: a map, 20 – 40 tree taps (sprules), 20 – 40 metal buckets with lids, drill, 7/16 “drill bit, hammer, 3 foot cloth measuring tape, two helpers, a cord of wood, three large iron kettles, hooks and iron chains, saw, axe, beer, thermometer, brix refractometer, filter sieve, oven mitts, tent, sleeping bags, shotgun, lamps, more beer and a variety of glass bottles with lids. One item which you won’t recognise is a tree tap or sprule.
This can be purchased at a Canadian Tire depot with dollars or Canadian Tire money which is Canada’s real currency.
 
One item which you won’t recognise is a tree tap or sprule.
This can be purchased at a Canadian Tire depot with dollars or Canadian Tire money which is Canada’s real currency. 
You may have not come across a brix refractometer either. Ditto Canadian Tire.
The first item on the agenda is to travel to an area which actually has sugar bush. 

Good weather for sap production is night temperatures in the 20s F and sunny days with temperatures in the 40s F. This alternate freezing and thawing temperature cycle (which can also cause potholes on roads) causes the pressure changes inside the tree that makes the sap flow. If the night time temperatures are too cold, it takes a longer time for the sap to warm up and ‘run’ in the daytime. If the temperatures are very cold, the sap may not run at all.

WARNING! You might run into bears which have just wakened up from hibernation and are HUNGRY. Safety first. Bring at least one person who can’t run as fast as you. If you’re particularly Machiavellian buy insurance with yourself as the beneficiary. Alternatively do a Sarah Palin and arm yourself with a short barreled SxS 12 gauge with Remington Buckhammer slugs – don’t retreat. Reload!
Learn to recognize the right trees. Tapping an elm tree is pointless and embarrassing. The main maple producing tree is known as the Sugar Maple, or Hard Maple ( acer saccarum) which is the best provider of the highest quality sap. It grows as tall as 100 feet. A few of the other main types of maple trees are The Red Maple (acer rubrum), The Silver Maple (or Soft Maple) and The Ash Leafed Maple (or Box Elder) You may need to enlist the help of the indigenous people. They are friendly and will trade for Canadian Tire money.

Local and two specimens of H. Canukistanus (two of my daughters)
 Depending on the tree’s diameter and strength, it may be fitted with as many as three (3) taps. Use the cloth tape to measure the diameter. Trees with trunks less than 25 cm in diameter should not be tapped at all. Prudent tapping is harmless to the maple. Each tap will produce 10 gallons over a six week period.
Drill 1 cm (7/16″) holes about 5 cm (2-2 1/2″) into the trunk of the tree. Use the hammer to place the sprules into the tree. The sap will deteriorate if not attended to. The sap must be boiled the same day it is gathered, so a hot and steady fire is kept going at all times.

The “boiling down” process is slow – sometimes continuing far into the night. Bring lots of beer. Evaporation that is too slow or too fast will affect the color, flavour and texture of the syrup. At sea level, the correct temperature for evaporation is 104ºC. However, since the boiling point varies with altitude, a thermometer must be used to adjust the cooking temperature. For example, in a region where the boiling point of water is 98ºC (or 2ºC below normal), the cooking temperature of the sap must also be reduced by 2ºC (to 102ºC

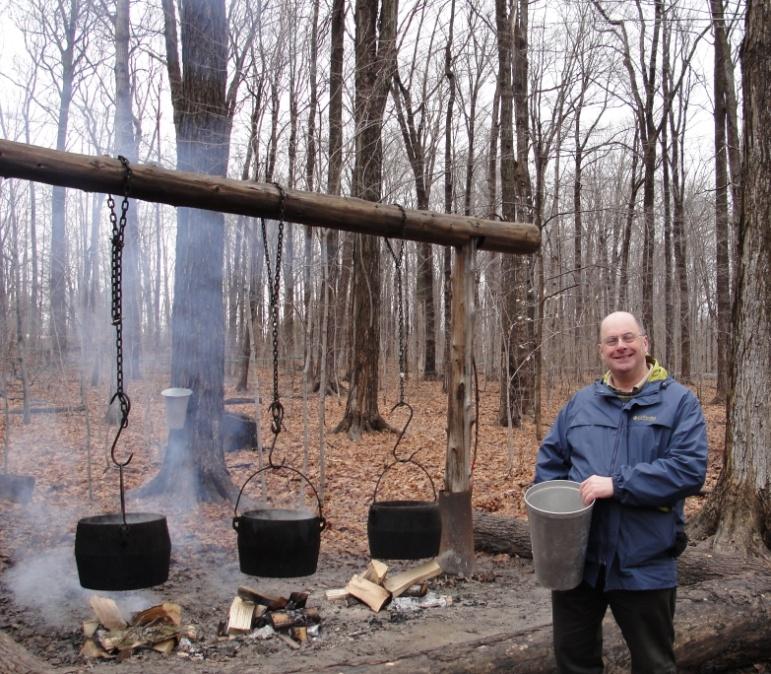
I use the three kettle method where I put the raw sap which has the consistency of water into the first kettle and then transfer the more concentrated sap into the second. Repeat from the second kettle to the third where the final evaporation takes place. It takes about 40 gallons of sap to make one gallon of syrup. If you use maples other than the sugar maple, the syrup will be darker because the other trees have a lower concentration of sugar and the boiling will take longer.

Maple syrup must be filtered to remove the impurities that could affect its appearance and flavour. Orlon or felt make good filters. Filters should be cleaned with hotwater only (no detergent) and dried thoroughly before and after each use. New filters must be washed before use. Bottles or jars used to store syrup should also be cleaned and rinsed prior to bottling. It is important to adjust the density to between 66º and 67º Brix (the Brix unit of measurement indicates the risk of fermentation or crystallization). Use the brix refractometer. The syrup is then bottled or put in galvanized metal cans while still very hot (87ºC or more). The heat sterilizes the containers and prevents the formation of mold.

You can use maple syrup as a replacement for sugar in any recipe.

>Clarissa’s Real Ukrainian Borscht

>

I seem to be placing recipes in a way that highlights each part of my complex identity. First, there was my Canadian split pea soup with bacon that symbolizes my Canadian identity. Then, I shared the recipe for the Peruvian fish soup that represents the Spanish-speaking part of my identity. Now the time has come for me to offer you a recipe of the most traditional and time-honored Ukrainian dish: the borscht. (Why I seem to be stuck on soups for the moment is a mystery.)
If you only tried borscht in restaurants, then you never tasted real Ukrainian borscht. Every Ukrainian has their own recipe of borscht which can’t be mass produced while preserving the quality. This is why I’m now offering you my own recipe of borscht. Enjoy!
You will need:
  • a piece of meat on a bone (either pork or beef). I have also made borscht using chicken in the past, and it was a great success. Feel free to skip the meat for a vegetarian version of the borscht.
  • dry white beans (1 cup). This is often skipped too but I find it makes borscht much heartier.
  • 1 medium sized onion.
  • 1 bay leaf.
  • 2 medium sized carrots
  • 1 large or 2 small beets
  • 1 small can of tomato paste
  • 2 large potatoes
  • 1/3 of a head of cabbage
  • 1/8 of a bunch of parsley or cilantro
  • sour-cream to serve
1. Wash the meat and place it in a large cooking pan. Pork is normally used for borscht by real Ukrainians but I don’t like pork. For me, it’s a good, beautiful piece of beef. Fill the pan with water and add the onion and the bay leaf. Feel free to add some peppercrons too.
We only just started cooking and
it already looks beautiful. The
visual component is crucial in Ukrainian
cuisine. Food is supposed to look festive and fun.
2. Bring the water to the boil and reduce the fire as soon as it starts boiling. Don’t let it stay boiling! Add some salt to the water and leave the stock simmering on a slow fire until the meat is ready (1,5-2 hours). Every once in a while, remove the foam that gathers on the surface with a slotted spoon. The more foam you manage to remove, the better your stock will be in the end. If you have decided to use the beans, now is the time to add them to the pan. Don’t use canned beans: they will kill the borscht. It’s better to add no beans at all than to use canned ones.
3. While the meat and beans are cooking, peel and cube potatoes. Wash and dice the carrots and the beets.
4. When the meat (and beans if you are using them) is ready, discard the onion and the bay leaf. Remove the meat from the pan. Let it cool. Cut some of the meat into small pieces and add them to the borscht. Reserve the rest of the meat for another recipe. Add peeled, cubed potatoes to the cooking pan.
5. In a small frying pan, heat some olive oil. Add the diced beets and carrots and fry them on medium for 5 minutes.
6. Add some of the prepared beef stock to the frying pan. Pour in 1 can of tomato paste. If you want your borscht to be of a darker color, add some beet juice. If you want it to be sweeter, feel free to add some fresh carrot juice. Leave the pan simmering for 7-10 minutes.
The choice is yours whether to use more beets and less carrots,
vice versa or an equal amount of both
7. In the meantime, shred cabbage. The cabbage should normally be green but it so happened that I only have red cabbage in the house, so I decided to use it instead.
It’s up to you how much cabbage to use based on
how much you like cabbage. Some people who are really
not into cabbage have been known to skip it altogether
8. Add the tomato sauce to the cooking pan with the stock and the potatoes. Then, add shredded cabbage to the pan as well.
 
9. When the cabbage is almost ready, add fresh parsley or cilantro. Keep tasting the cabbage to determine whether it’s ready because it takes different kinds of cabbage a very different amount of time to cook. The cabbage should be “al dente”, so to speak. Make sure it is not mushy. As soon as the cabbage reaches the desired degree of softness, take it off the fire and let it stand for 10-15 minutes.
 
This is how the borscht looks when it’s almost ready
10. Serve borscht with a table spoonful of sour-cream. True Ukrainians stick a really hot red pepper into their borscht and eat it with wooden spoons.
Borscht is served with sour cream.
I don’t drink vodka, but it makes the picture
look more authentic

>Clarissa’s Chupe de mariscos from Peru (Peruvian Seafood Soup)

>We have Peruvians in the family, so Peru’s wonderful cuisine is very appreciated. Today I will share with you my version of my favorite Peruvian dish – Chupe de mariscos, or a seafood soup. Peruvian food is not only delicious and healthy. It is also aesthetically pleasing, which this particular chupe showcases beautifully.


Ingredients for the
chupe de mariscos The fruit obviously are not
part of the dish. They are just there
because it’s their place

 1. First of all, I have to warn you that there are quite a few ingredients in this soup. You can see them gathered in this picture. I am cooking this in a small Midwestern town, so some of the ingredients are not available to me and I have to improvise. It is still absolutely delicious, though. So this is what I will use:

-bouillon (if you don’t have it, just use water);
-raw shrimp;
-a couple of fillets of white swai and cod (you can take the fillet of any fish you like as long as it’s white);
-a small turnip,
-a couple of potatoes;
-frozen green peas (fresh peas are best, if you can get them);
-4-6 eggs;
-a little can of tomato paste;
-1-2 cans of evaporated milk (you decide how much you want to use);
-fresh cilantro and oregano;
-garlic;
-a couple of medium or one big carrot;
-hot yellow peppers;
-unsalted butter;
-some rice (you can skip this ingredient if you like);
-and, of course, salt and pepper.

2. Heat up 8-10 cans of bouillon or water in a big pan. Make sure you add salt to taste. In the meanwhile, mince garlic and hot yellow peppers. The quantity of these ingredients is up to you. We prefer more garlic and very little peppers, but some people do the opposite. Take a small frying pan, melt 1/4 of a stick of unsalted butter in it, and fry garlic and peppers on medium heat for under a minute. The garlic should not be allowed to get dark.
3. Peal and cube the carrot, the potatoes and the turnip. Carrot cubes should be smaller than potatoes and turnips. Add the vegetables and garlic + peppers to the boiling bouillon.


Here you can see comparative sizes of
cubed vegetables. Potatoes
are in the front and the turnip is in
the back. Feel free to use any variety of sweet potato.

4. Then add 2 table spoons of tomato paste to the bouillon. Add 1/2 tea spoon of oregano. If you will be using rice, add a handful now. Don’t add too much rice, or it will absorb all the delicious liquid, and you will end up with a stew instead of a soup. 

5. When the vegetables are done to the desired degree of softness, add fish fillets cut into pieces and raw, peeled shrimp. Again, it’s up to you to decide how much fish and shrimp respectively you want to add. It’s also a great idea to add fresh calamaris at this point, but I don’t have any today.
Make sure you don’t get the precooked shrimp.
You need raw shrimp, or it won’t be the same at all.
Raw shrimp need to be peeled and deveined.
This can be done for you at the store.

6. When the fish ans shrimp are halfway done, start adding the evaporated milk. Stop adding the milk when the soup reaches a pleasing color. Feel free to add more or less evaporated milk, according to your preferences. Some people use as much as 2 cans, while I normally use just one.

7. Now is the time to add a cup of peas and 4-6 eggs. At the very end, chop some cilantro and add it to the soup. When the eggs are cooked, turn off the heat. Let the soup stand for 10 minutes. And now try it and tell me if it isn’t absolutely delicious.

It even looks beautiful!

 ¡Buen provecho, amigos! Enjoy!