Cod Liver Salad

For people who are here for the food, here’s a recipe of my favorite cod liver salad:

  • Cod liver
  • Very finely chopped red onion
  • Very finely chopped radish
  • Boiled egg
  • Some mayo or your favorite aioli

Mix it up and spread on cucumber slices like a sandwich.

Keto-friendly, very delicious.

Spanish Garlic Soup (Sopa de Ajo): A Recipe

“What kind of a Hispanist am I if I never tried Spanish sopa de ajo(garlic soup)?” I asked myself recently. So I decided to make my first garlic soup ever. Even though it didn’t

Sopas de ajo

look, feel, or taste like what we call “soup” in my culture (no potatoes! no carrots! no cabbage!), it was still very good and hearty, which was especially appropriate for the first cold spell this Fall.

Here are the ingredients I used:

Ingredients

    • Half a loaf of stale bread (please don’t get that weird kind that never goes stale).
    • 10-12 cloves of garlic (I wimped out and only added 8, which was a mistake).
    • several strips of bacon and some bacon bits (this is what I used to substitute for Spanish amazing jamon serrano which I obviously don’t have here)
    • 6 eggs
    • some stock that I substituted with water
    • olive oil
    • a little paprika (substitute with cayenne paper if you don’t mind hotness.)

In some olive oil, fry bacon strips cut into pieces until they become golden. Cut garlic cloves into smallish pieces and add them to the pan. Make sure the garlic becomes golden but doesn’t burn.

Garlic and Bacon

Cut your stale loaf into crouton-sized cubes and add them to the frying-pan. When all ingredients are pleasantly golden, remove the pan from the fire and add 1/3 of a teaspoon of paprika. It is supposed to cover your ingredients with nice reddish color. Make sure paprika doesn’t burn, though!

In the meanwhile, heat up your stock (or water) in a pan. Add some more crouton-sized pieces of stale bread. Some people just add big slices of bread but that’s too exotic for me. When the ingredients in the frying pan are ready, add them to the stock. Now, let everything simmer for 20 minutes. I didn’t add any salt because my bacon was salty enough for my preferences. This is up to you, of course.

IMPORTANT: At no point should you allow your soup to boil. So keep an eye on it at all times. It boils, it’s ruined.

When the soup is almost done, beat the eggs into it. I also left two yolks out and added them to the plate after the soup was served. When you break up the yolk in the plate, it spreads around, and the soup becomes even more delicious.

Here is what the garlic soup ended up looking like:

Sopas de ajo

I obviously need to get a new camera soon because I don’t think that on this cell phone photo you can really see that the soup ended up looking like a flower in the plate. It was very tasty, too.

Roast Chicken With Baby Potatoes and Mushrooms: A Recipe

I haven’t posted any recipes for a while, so I decided to share with my readers a recipe that might come in handy at the beginning of the academic year. This is a dish that takes very little time to prep but that can feed you for a week after you make it. If you have a stretch of a few busy days coming up, you make the dish and then forget about cooking for a while.

Here is what you will need:

– a roasting chicken;

– a sack of baby potatoes. Make sure they are baby potatoes because if you use regular potatoes, the dish won’t work.

– mushrooms of your choice;

– the herb of your choice. I use cilantro because I adore cilantro. Basil, tarragon or rosemary can also be used. There are also herb mixes that you can get instead of fresh herbs, if you are so inclined.

– half a stick of butter (can be skipped if you are trying to be healthy.)

– a few cloves of garlic.

1. In a roasting pan (I use a cheap disposable one to cut down on cleaning time), place quartered baby potatoes and mushrooms broken into pieces. There is no need to peel the potatoes after washing them. Just quarter them as fast as you can and throw some mushrooms on top. Add salt and pepper.

I like using baby potatoes of different colors because it always makes a dish more visually appealing

2. Melt the butter, squeeze a few cloves of garlic into it, cut up the herbs and mix everything in a bowl. It’s perfectly fine to skip the butter if you are trying to be healthy. Here is what the mix will like if you decide to use the butter:

3. Wash the chicken, salt and pepper it. I chose a big chicken because I have a few busy days coming up and want it to last for a while. Rub the herb, garlic and butter mix on the chicken. Try to get some of the mix under its skin. Then, stick some remaining fresh herbs into the inside cavity. Then, place the chicken on top of the potatoes and the mushrooms.

4. Place the entire thing into a heated oven and forget about it until it’s cooked. I never use a thermometer to determine when the chicken is ready. My way of knowing that it’s done is by smell. When it starts to emit a really delicious aroma, it’s done. This is how the dish will look when it’s done:

I had to stand on a chair to take the photo. 🙂


Clarissa’s Red Mullet With Spicy Salsa: A Recipe

Red mullet is a great fish that tastes and looks beautiful. The salsa that I made to accompany it can be used with a variety of dishes or as a dip.

Clean your fish by removing the scales and the innards. Red mullet’s liver is a delicacy, so if your fish comes with a liver, consider leaving it inside. Of course, if you are not a liver person, then just get rid of it. (What a waste, though!) Salt and pepper your fish, sprinkle it with some lemon juice and put it in a frying pan with some olive oil:

Isn't it pretty?

You will have to fry the fish about 2.5-3 minutes on each side. In the meanwhile, place a big ripe tomato, half a bunch of cilantro, and several cloves of garlic into a blender. I used young garlic and it made the salsa all that much better.

It’s up to you how chunky you want the salsa to be, so you decide how long you blend the ingredients.

I serve the mullet with fluffy Moroccan couscous and pour the salsa on top of the fish. It’s very easy to make, delicious, and looks great.

This is the end result

Clarissa’s Chicken Soup With Rice: A Recipe

As I mentioned before, I prefer to make complex, multi-ingredient recipes that take hours to prepare. However, sometimes one feels like creating a simple, easy-to-make old favorite. In our family, chicken soup with rice is one of such staples.

The most difficult part of making this soup is preparing chicken stock. The stock is central to this dish’s success and can under no circumstances be substituted with the store-bought kind. To make really good chicken stock (that you can use for all kinds of soups, not just this one), take some chicken meat on the bone. I only had drumsticks in the house, so I took four of them, removed the skin(nobody in hour house likes the skin) and put them into a large pan filled with water.

This is how it needs to look before you start cooking

I also added a medium-sized onion, two small bay leaves, and several peppercorns. After this is done, put the pan on high heat. It is very important that your stock never starts to boil. This is why you need to hang around as it heat up. Grey foam will start appearing on top of the stock, and you will have to keep removing it with a slotted spoon. Granted, that’s a drag, but the more foam you remove, the clearer your stock will end up looking. After the stock comes almost to the boiling point, lower the heat, add some salt, dice a carrot and add it to the stock. Now, your stock will need to remain on low heat for about 90 minutes.

This is what your stock will look like after it’s done:

The stock was so clear that I had trouble taking a picture without my reflection appearing in it

Don’t forget to remove the bay leaf and the onion after the stock is ready.

While the stock is cooking, boil some eggs and make some white rice the way you regularly make it. Make sure the rice isn’t mushy. Put a tablespoonful of rice, half a boiled egg, some chopped fresh cilantro into a bowl. Add the stock. Throw in a couple of croutons. And you are ready to eat.

Pretty, huh?

Notice how clear the stock looks. You can barely even see it. This means it was made correctly and enough foam was removed in the process.

This soup can easily be eaten as a main course.

Enjoy!

Clarissa’s Frog Legs Soup: A Recipe

I love making soups because you can be as inventive as you want and use up all the stuff you have floating around the refrigerator. Today, I decided to make a soup of frog legs and fish. Once again, a Google search didn’t offer any interesting recipes, so I decided to improvise. It turned out so good that I have already devoured two big bowls.

Here is what you will need:
3-4 pairs of frog legs
3-4 fish of any kind you like. The fish should be skinless but it is very important not to remove either the backbone or the tail. They are needed to make the broth less watery.
3 potatoes
2-3 carrots
salt, herbs, spices
some fresh sage
Here are the frog legs and the fish all ready for cooking. Separate frog leg pairs in two so that you have to separate legs. There is no need to chop them up onto smaller pieces.
You can use either fish stock or simply water if you have no stock handy. Place the chopped carrots and the frog legs into the broth (or water) and place the pan on high. You will need to bring it to the boiling point and then reduce the heat immediately.
Add a bay leaf, salt and pepper, and any herbs and spices you like. I added dry oregano, cumin seeds, several cloves, mustard seeds, and when the soup was almost ready, some fresh sage. Peel, cube and add potatoes to the soup. After 10 minutes or so, cut the fish into chunks of the same size and add them to the pot. Let the soup simmer on slow until the potatoes taste ready but not mushy. Here is how the soup ended up looking:
If you let it stand for a few hours after making it, the soup will taste even better.

Vegetarian: Clarissa’s Vegetable Ragout

Recently, I felt a craving for a good, colorful vegetable ragout. However, a long Internet search didn’t result in a single recipe that didn’t look boring or monochromatic and didn’t include either meat or canned vegetables. So I had to invent my own recipe. Some of the ingredients of this vegetarian ragout were things that I’d never tried before, like eggplants. (Yes, I’d never eaten eggplant in any form in my life.) I really loved the result and decided to share it with my readers.

Here is what my Vegetable Ragout ended looking like:
I’m folding the detailed description of how to make it under the jump break to spare those who aren’t interested the trouble of scrolling through endless photos of diced vegetables.

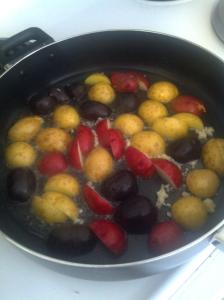
These are the main ingredients I chose for my ragout but you can, of course, change any of them. I selected three kinds of baby potatoes (yellow, red and black) because it’s very important to have a colorful ragout, juicy heirloom tomatoes, zucchini, yellow squash, baby turnips, baby eggplant, young carrots, garlic, ginger, and a bunch of cilantro.

Peel several cloves of garlic and crush them. Heat some olive oil in a large pan and place the garlic in the oil. In the meanwhile, cut your baby potatoes in half and place them in the pan, too.
Every step of this recipe looks colorful
and delicious. And it smells fantastic, too
Dice the turnips and the young carrots making sure that the chunks are not too small. If you cut them too small, they might become mushy, which is something we are trying to avoid. Vegetables in a ragout should be cooked but still preserve some firmness. Otherwise, we can just make a puree and be done with it. Then, add a bay leaf and some coriander seeds, if you like them. Dice ginger in very small cubes and add them to the pan.
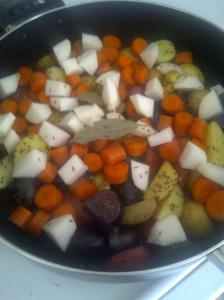
The white chunks are pieces of baby turnip
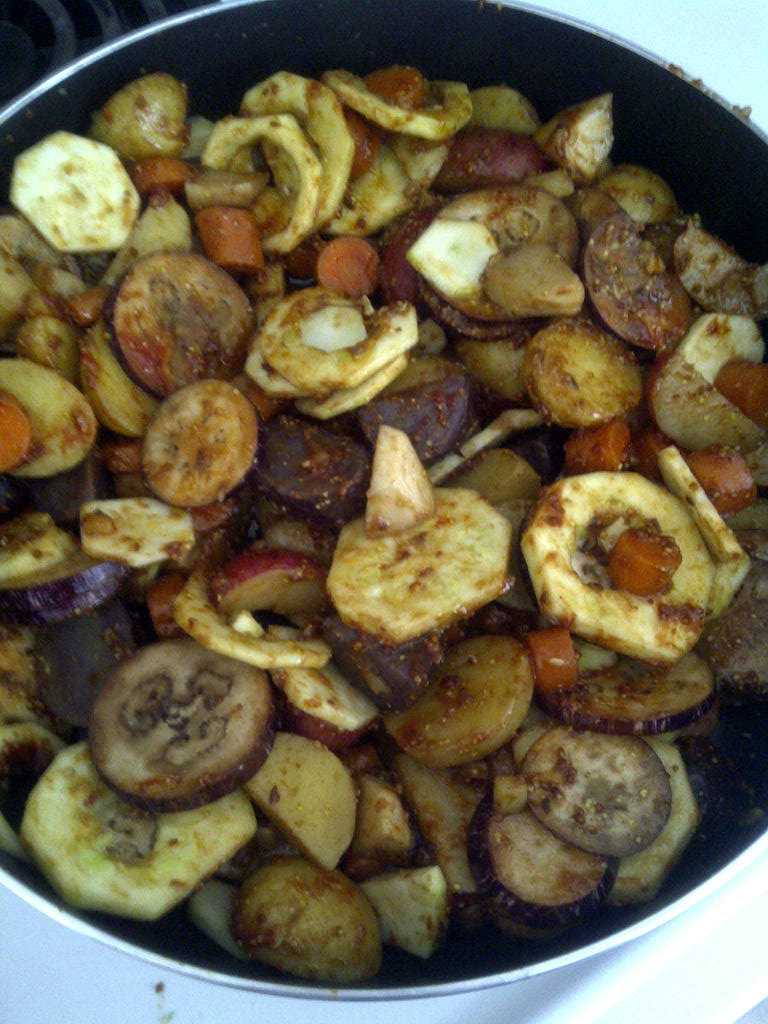
Cut baby eggplant and add it to the pan. You don’t have to spread it around the way I did, of course. I just did it to make sure the photo is pretty, that’s all. During this entire time, the pan has been on medium-high.
In the same manner, cut the zucchini and the squash and throw them into the pan. Now it’s time to add herbs and spices (the choice is really up to you) and start making the sauce. Put 1 tablespoon of coarse-grained Dijon mustard and 1 tablespoon of tomato paste into the pan. Mix everything up. Add as much or as little salt as you want. (I’m trying to avoid salt altogether, so I added none and the ragout still tasted heavenly.) This is how your ragout will look after you complete this step:
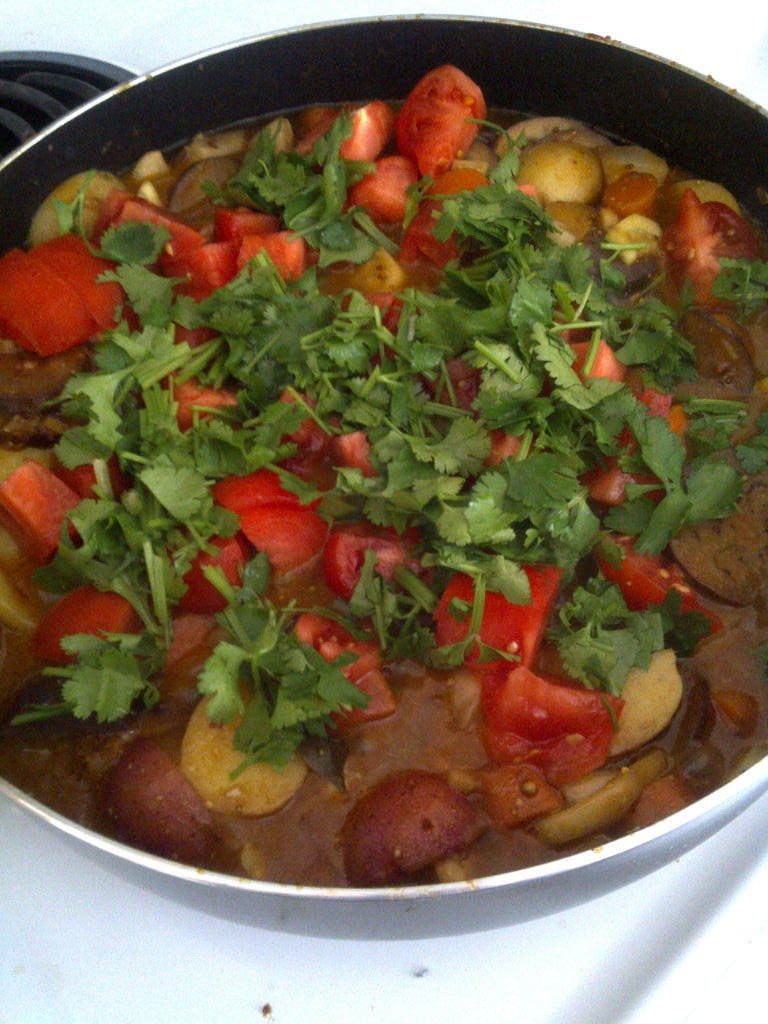
Dissolve a tablespoon of flour in a cup of cold water and add the mix to the ragout. This will thicken the sauce. Close the pan with a tight-fitting lid and let the ragout simmer until the vegetables are almost ready. Then, dice the tomatoes and add them to the ragout. Also, add fresh cilantro. This is how the ragout will look at this point:
Mix everything up, close the lid, and leave the ragout on slow for another 10 minutes. And here we have it: